Make Rocky Ledge Bars: The Simple, Crowd-Pleasing Recipe
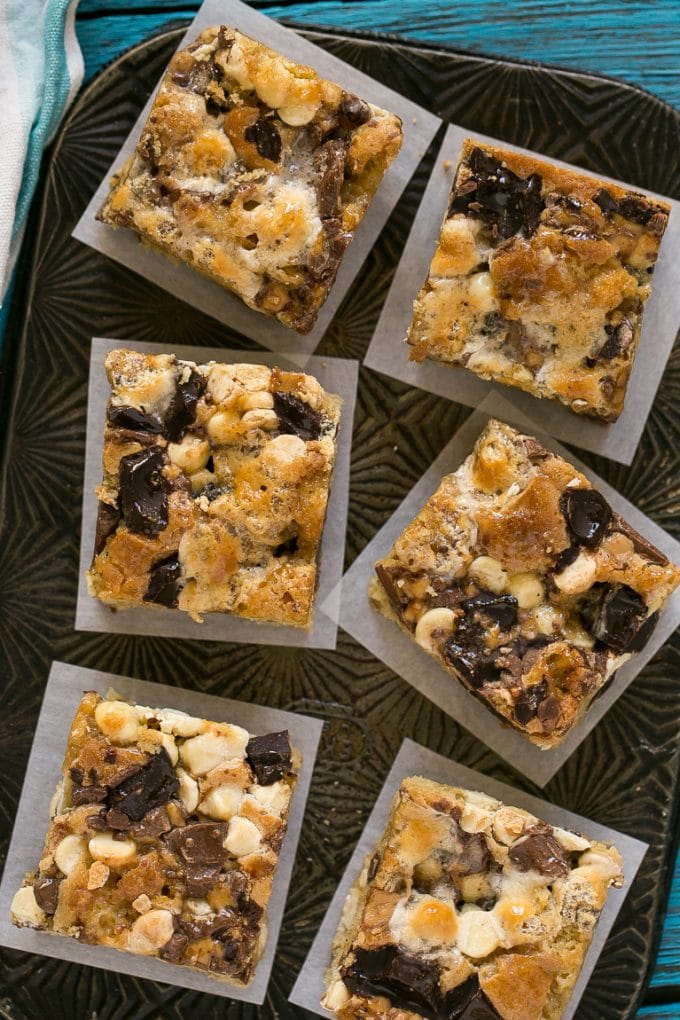
Prepare to meet your new obsession: Rocky Ledge Bars, affectionately known by many as "Crack Bars." This isn't just another dessert recipe; it's a culinary phenomenon renowned for its irresistible blend of gooey, chewy texture and an explosion of rich flavors. Imagine a perfectly tender brown sugar cookie base, generously studded with not one, not two, but three kinds of chocolate, along with delightful pockets of mini marshmallows and crunchy toffee bits. It's the ultimate handheld indulgence that consistently disappears from every dessert table, earning its affectionate, albeit mischievous, nickname for its utterly addictive quality.
Whether you're a seasoned baker or just starting your sweet journey, these bars promise an incredibly rewarding experience. The premise is delightfully simple: whip up a rich cookie dough, load it with an abundance of your favorite mix-ins, bake until golden, and then watch the magic unfold. They're perfect for potlucks, holiday gatherings, school bake sales, or simply as a comforting treat for your family. If you're ready to bake a dessert that will have everyone begging for the recipe, you've come to the right place. Dive in and discover why Rocky Ledge Bars are about to become your go-to crowd-pleaser.
Why Rocky Ledge Bars Are Your New Favorite Dessert
There's a reason why these delectable treats have garnered such an enthusiastic following, often being made dozens, if not hundreds, of times by devoted fans. From their first bite, you'll understand the hype. These aren't your average cookie bars; they're a symphony of textures and tastes – gooey, sticky, decadent, and utterly satisfying. The rich brown sugar cookie base provides the perfect canvas for the generous medley of add-ins, creating a dessert that feels both homemade and incredibly gourmet.
The beauty of Rocky Ledge Bars lies in their universal appeal. Who can resist a dessert boasting three different kinds of chocolate, alongside the chewy charm of marshmallows and the satisfying crunch of toffee? This robust combination ensures there's something for everyone in every square. Their simplicity makes them an ideal choice for any occasion where you need a reliable, show-stopping dessert that's guaranteed to be devoured. Many bakers find themselves returning to this recipe year after year, especially for holiday baking traditions, where batches disappear almost as quickly as they emerge from the oven. If you're looking for a dessert that consistently earns rave reviews and leaves a lasting impression, your search ends here.
Mastering the Rocky Ledge Bars Recipe: Ingredients & Method
Crafting these celebrated bars is surprisingly straightforward, focusing on quality ingredients and simple steps. Here’s everything you’ll need and how to bring it all together for the perfect batch of Rocky Ledge Bars.
The Essential Ingredients
The foundation of these incredible bars is a classic cookie dough, elevated by a generous assortment of mix-ins. While the specific brand might vary, the quality of your ingredients will shine through.
- Cooking spray: For preparing your baking pan.
- 1/2 cup (1 stick) unsalted butter: Softened to room temperature for a smooth, creamy base.
- 2 1/4 cups all-purpose flour: The structural backbone of your cookie bars.
- 2 1/4 teaspoons baking powder: To give the bars a slight lift and tender texture.
- 1 teaspoon kosher salt: Balances the sweetness and enhances all the flavors.
- 1 1/2 cups packed brown sugar: You can use light or dark brown sugar; light typically offers a slightly softer, chewier texture, while dark adds a deeper molasses note. Pack it firmly into the measuring cup for accuracy.
- 3 large eggs: Binds the ingredients and adds richness.
- 1 teaspoon pure vanilla extract: A crucial flavor enhancer for any cookie.
- 1 cup miniature marshmallows: These melt into gooey pockets of sweetness.
- 1 cup semisweet chocolate: Use chips or coarsely chopped good-quality chocolate for a rich, deep flavor.
- 1 cup milk chocolate chips: For that classic, creamy chocolate taste.
- 1 cup Toffee bits: Adds a delightful crunch and buttery caramel flavor.
- 1/2 cup white chocolate: Chips or coarsely chopped, offering a contrasting sweet and creamy note.
Step-by-Step Baking Instructions
Follow these steps closely for the best Rocky Ledge Bars experience:
- Prepare Your Pan: Preheat your oven to 350°F (175°C). Line a 9x13-inch baking pan with foil, ensuring you leave an overhang on two opposite sides. These foil "handles" will make lifting the finished bars out of the pan incredibly easy. Lightly spray the foil with cooking spray to prevent sticking.
- Combine Dry Ingredients: In a medium bowl, whisk together the flour, baking powder, and kosher salt. Set aside.
- Cream Butter and Sugar: In the bowl of an electric mixer fitted with the paddle attachment, cream together the softened butter and packed brown sugar until the mixture is light and fluffy, usually about 2 minutes. This step is vital for a tender bar.
- Add Wet Ingredients: Beat in the large eggs one at a time, mixing until each is fully incorporated. Stir in the pure vanilla extract until just combined.
- Integrate Dry and Wet: Gradually add the flour mixture to the wet ingredients, mixing on low speed until just combined. Be careful not to overmix; overmixing can lead to tough bars.
- Fold in Add-ins: Gently fold in half of the miniature marshmallows, half of each type of chocolate (semisweet, milk, and white), and half of the toffee bits. This ensures some mix-ins are throughout the dough, while the rest create a beautiful top layer.
- Spread and Top: Spread the batter evenly into your prepared 9x13-inch pan. It might be thick, so use an offset spatula or the back of a spoon. Scatter the remaining marshmallows, chocolates, and toffee bits evenly over the top of the batter.
- Bake to Perfection: Bake for approximately 25-30 minutes, or until the top is golden brown and a cake tester or toothpick inserted into the center comes out clean. Keep an eye on them towards the end, as oven temperatures can vary.
- Cool and Chill: Let the bars cool completely in the pan on a wire rack. Once at room temperature, lift the bars out using the foil overhangs and transfer them to a baking sheet. Refrigerate for at least 30 minutes, or preferably an hour, until thoroughly set. This chilling step is crucial for clean, neat cuts.
- Cut and Serve: Remove the chilled bars from the foil, place them on a cutting board, and cut into 20 squares (5 rows x 4 rows) or your desired size.
Unlock Endless Possibilities: Customizing Your Rocky Ledge Bars
While the classic combination of three chocolates, marshmallows, and toffee is undoubtedly a winner, one of the most exciting aspects of Rocky Ledge Bars is their incredible adaptability. The "crack bar" premise is simple: a delicious cookie base overloaded with goodness. Your pantry and imagination are the only limits! As highlighted in Build Your Perfect Rocky Ledge Bars: Ultimate Add-in Guide, you can truly make these your own.
Here are some creative ideas to inspire your next batch:
- Nutty Variations: Add chopped walnuts, pecans, or sliced almonds for an extra layer of crunch and earthy flavor. Roasted and salted nuts can provide a wonderful contrast to the sweetness.
- Caramel Delights: Incorporate soft caramel bits or mini Rolos for pockets of chewy, buttery caramel throughout.
- Fruity Twists: While less common, dried cranberries or cherries can add a tart counterpoint, especially if paired with white chocolate.
- Candy Crush: M&Ms, crushed candy canes (for a holiday twist), mini peanut butter cups, or even chopped Snickers bars can transform these into a candy bar dream.
- Texture Play: Pretzels (crushed or mini whole ones) offer a salty crunch that perfectly complements the sweet and gooey elements. Shredded coconut adds a tropical chewiness.
- Themed Editions:
- S'mores Version: Swap out some chocolate for milk chocolate bars, add extra marshmallows, and mix in crushed graham crackers.
- Birthday Cake Fun: Use white chocolate, sprinkles, and perhaps a touch of almond extract in the dough for a celebratory feel.
- Peanut Butter Lover's Dream: Peanut butter chips, mini peanut butter cups, and maybe a swirl of peanut butter in the batter.
The key to successful customization is to maintain a similar total volume of add-ins – generally around 4 to 4.5 cups – to ensure the bars hold together and have that signature loaded texture. Don't be afraid to experiment; you might just discover your new favorite combination!
Smart Tips for Success and Enjoyment
To ensure your Rocky Ledge Bars are always a resounding success, keep these practical tips in mind:
Make Ahead & Storage
These bars are fantastic for making in advance, which is perfect for holiday baking or party prep. You can store baked bars in an airtight container at room temperature for up to one week. For longer storage, Rocky Ledge Bars freeze beautifully. Simply wrap individual bars tightly in plastic wrap, then place them in a large freezer-safe resealable bag or container. They will keep well in the freezer for up to 3 months. Thaw at room temperature for a quick treat.
Kid-Friendly Baking
Rocky Ledge Bars are a fantastic recipe to get little helpers involved in the kitchen. Children can assist with measuring ingredients, mixing the dry components, and, most excitingly, folding in all the chocolate, marshmallows, and toffee. They'll especially love scattering the remaining toppings over the batter before baking, giving them a sense of ownership over these delicious creations. It's a wonderful way to create lasting memories and introduce them to the joys of baking.
Perfect Portions & Presentation
For the neatest cuts, ensure your bars are thoroughly chilled before slicing. A warm knife can also help – run it under hot water, wipe it dry, and then make your cuts. Clean the knife between cuts for ultra-sharp edges. These bars are delightful on their own, but for an extra decadent treat, serve them slightly warmed with a scoop of vanilla bean ice cream or a drizzle of chocolate sauce. Their rich, gooey nature makes them the perfect complement to a cool, creamy scoop.
Why the Chill Time is Crucial
Don't skip the refrigeration step! Chilling the bars until they are fully set is paramount for achieving those clean, distinct squares. It allows the melted chocolate and marshmallows to firm up, preventing a messy, crumbly cut. Patience here will be rewarded with beautifully presented, perfectly textured bars that are easy to handle and enjoy. For a deeper dive into why these bars are so utterly captivating, explore Rocky Ledge "Crack Bars": Your Next Obsessive Dessert.
Conclusion
Rocky Ledge Bars, or "Crack Bars" as they're lovingly called, are more than just a recipe; they're an experience. With their rich brown sugar base, an abundance of three chocolates, gooey marshmallows, and crunchy toffee, they deliver on every promise of a decadent, satisfying dessert. Easy to make, versatile to customize, and utterly irresistible, these bars are guaranteed to be a hit at any gathering and will quickly become a cherished staple in your baking repertoire. So gather your ingredients, enlist your little helpers, and prepare to bake a batch of pure happiness that will leave everyone craving just one more piece!
