Build Your Perfect Rocky Ledge Bars: The Ultimate Add-In Guide
There are some desserts that transcend mere sweetness, becoming legendary for their irresistible allure. Rocky Ledge Bars, affectionately (or perhaps addictively) known as "Crack Bars," fall squarely into this category. If you've ever had the pleasure of sinking your teeth into one of these gooey, chewy, chocolate-laden wonders, you'll understand why. A harmonious blend of a rich brown sugar cookie base, generous chunks of chocolate, soft marshmallows, and crunchy toffee bits, they are quite simply your next obsessive dessert. But what truly elevates Rocky Ledge Bars from delicious to divine is their incredible versatility, offering a canvas for endless creativity with add-ins.
Whether you're making them for a potluck, a holiday gathering, or just because you crave something decadently delightful, these bars are guaranteed to disappear in record time. This guide will walk you through the magic behind these phenomenal treats and, most importantly, empower you to customize them to your heart's content, ensuring every batch is uniquely yours.
The Allure of Rocky Ledge Bars: Why They're So Addictive
What makes Rocky Ledge Bars so utterly captivating? It starts with the foundation: a buttery, deeply flavored brown sugar cookie base. Unlike a typical crisp cookie, this base bakes up soft, chewy, and wonderfully gooey, providing the perfect counterpoint to the myriad textures and flavors packed within. The richness of the brown sugar imparts a caramel-like depth that classic white sugar simply can't match.
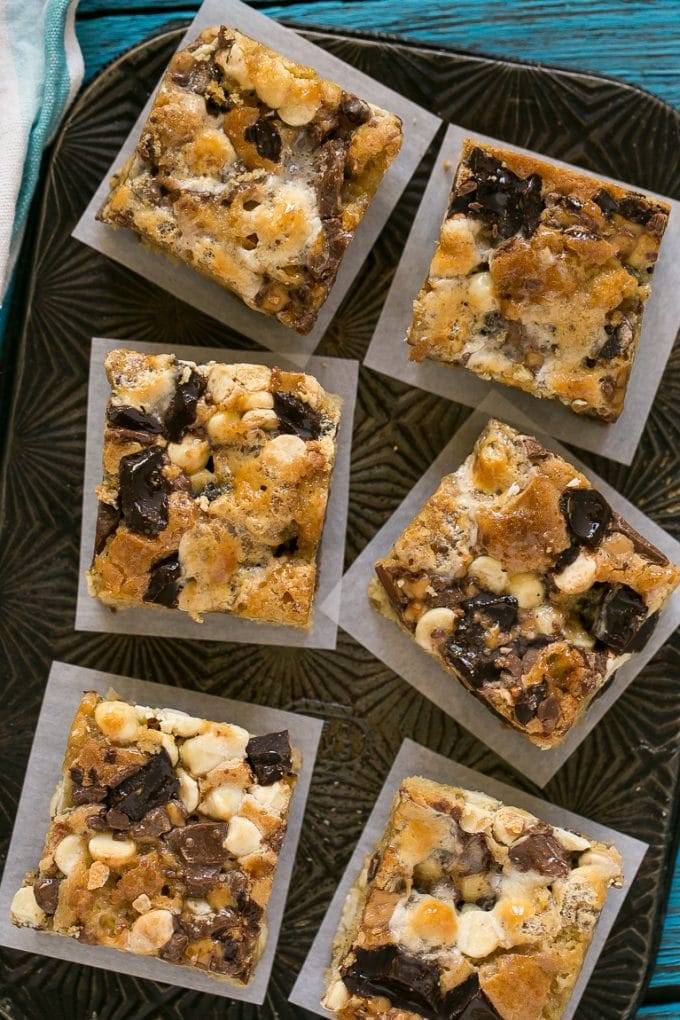
Then come the add-ins – the true stars of the show. The original recipe wisely calls for three types of chocolate (milk, semi-sweet, and white), alongside miniature marshmallows and crunchy toffee bits. This combination ensures a symphony of textures and tastes in every bite: the smooth melt of different chocolates, the ethereal chewiness of toasted marshmallows, and the delightful crunch and buttery sweetness of toffee. It's this interplay of soft and chewy, sweet and slightly savory, that keeps you coming back for more. They're a dessert experience that truly hits all the right notes, making them the ultimate handheld indulgence.
Mastering the Foundation: The Perfect Brown Sugar Cookie Base
Before we dive into the exciting world of add-ins, let's ensure your base is flawless. The brown sugar cookie dough is crucial for creating those beloved chewy, gooey Rocky Ledge Bars.
Key Ingredients for the Base:
- Unsalted Butter: Softened to room temperature, it creams beautifully with sugar, incorporating air for a light texture.
- Brown Sugar (Light or Dark): This is non-negotiable! Brown sugar is what gives these bars their signature caramel notes and moist, chewy texture. Dark brown sugar will lend a deeper, richer molasses flavor, while light brown sugar offers a milder sweetness. Both work wonderfully.
- Large Eggs & Pure Vanilla Extract: Eggs bind everything together and contribute to moisture. Good quality vanilla extract elevates all the other flavors. Don't skimp here!
- All-Purpose Flour, Baking Powder, Kosher Salt: The dry ingredients provide structure. Baking powder ensures a slight lift without making them cakey, and salt balances the sweetness, enhancing all the other flavors.
Tips for Success with the Base:
- Creaming Power: Don't rush the creaming of butter and brown sugar. Beat them together with an electric mixer until light and fluffy (around 2 minutes). This incorporates air and creates a tender crumb.
- Don't Overmix: Once you add the flour mixture, mix just until combined. Overmixing develops gluten, which can lead to tough bars.
- Room Temperature Matters: Ensure your butter and eggs are at room temperature. This allows them to emulsify properly, creating a smoother, more uniform dough.
Unleash Your Creativity: The Ultimate Add-In Guide for Rocky Ledge Bars
This is where the magic truly happens and where you can transform your rocky ledge bars aka crack bars into a personalized masterpiece. While the classic combination is phenomenal, the beauty lies in endless customization. The key is to maintain the total volume of add-ins – generally around 4 to 4.5 cups – to ensure your bars hold together beautifully without becoming crumbly or too dense.
Here are some categories and ideas to inspire your ultimate Rocky Ledge Bar creation:
Classic & Essential Add-ins:
- Chocolate Galore:
- Semi-Sweet Chocolate: Chips or coarsely chopped bars (provides a balanced, slightly bitter counterpoint).
- Milk Chocolate: Chips or chunks (for creamy, classic sweetness).
- White Chocolate: Chips or chopped (adds a different kind of sweetness and a lovely contrast).
- Pro Tip: Using chopped chocolate bars instead of just chips often results in larger, more satisfying puddles of melted chocolate throughout your bars.
- Toffee Bits: The original recipe uses these for good reason – they add a buttery, caramel crunch that is simply divine.
- Miniature Marshmallows: These toast beautifully on top and melt into gooey pockets inside, adding a delightful chewiness.
Daring & Delicious Variations:
Think beyond the traditional and consider what textures and flavors you want to introduce.
- Caramel & Chewy Delights:
- Butterscotch Chips: For a warm, rich, buttery flavor profile.
- Caramel Bits or Chopped Caramels: Imagine gooey pockets of caramel throughout your bars!
- Peanut Butter Chips: A fantastic addition for peanut butter lovers, especially paired with chocolate.
- Nutty Crunch & Texture:
- Sliced Almonds, Chopped Pecans, Walnuts: Toasted nuts add a wonderful crunch and earthy flavor that complements the sweetness.
- Peanuts: For a classic sweet and salty combination.
- Fruity Twists & Zesty Zing:
- Dried Cranberries or Cherries: A tart burst to cut through the richness.
- Orange or Lemon Zest: A hint of citrus can brighten the entire bar, especially good with white chocolate.
- Fun & Playful Additions:
- M&Ms: Add color and a familiar candy crunch.
- Mini Peanut Butter Cups: Chopped for extra peanut butter and chocolate goodness.
- Crushed Oreos or Graham Crackers: Great for adding a cookie crunch, especially for a "cookies and cream" or "s'mores" theme.
- Sprinkles: For a festive touch, especially when mixed into the dough or scattered on top.
- Sweet & Salty Combinations:
- Pretzel Pieces: A surprising but incredibly satisfying salty crunch.
- Sea Salt Flakes: Sprinkled on top before baking for a gourmet finish that enhances the chocolate.
Strategy for Mixing Add-ins:
The original recipe suggests folding in half of the add-ins into the dough and scattering the remaining half on top. This is an excellent technique as it ensures good distribution within the bar while also creating a beautiful, visually appealing top layer with toasted marshmallows and melted chocolate puddles. Don't underestimate the power of presentation!
Baking to Perfection: Tips for Irresistible Rocky Ledge Bars
Once you’ve assembled your customized dough, the baking process for these simple, crowd-pleasing bars is straightforward, but a few tips can make all the difference.
- Pan Preparation is Key: Always line your 9x13 inch baking pan with foil, leaving an overhang on two opposite sides. This "sling" will be your best friend when it comes time to lift the cooled bars out, making cutting a breeze. Don't forget to spray the foil generously with cooking spray to prevent sticking.
- Even Spreading: The dough for Rocky Ledge Bars is thick. Use an offset spatula or the back of a spoon (lightly greased if needed) to spread the batter evenly in the prepared pan. This ensures uniform thickness and even baking.
- Bake Until Golden: Bake at 350°F (175°C) for approximately 25 minutes. Look for a beautiful golden-brown top. A cake tester inserted into the center should come out clean, but remember, for that ultimate gooey factor, you don't want them overbaked. They will continue to set as they cool.
- Cooling & Chilling are Essential: This is a step you absolutely cannot skip!
- Wire Rack Cooling: Let the bars cool completely on a wire rack in the pan. Trying to cut them warm will result in a glorious, delicious mess.
- Refrigerate for Setting: Once cool, lift the bars out using the foil handles and transfer them to a baking sheet. Refrigerate for at least 30 minutes (or longer!) until they are firm. This chilling time is critical for achieving clean, neat squares.
- Cutting & Storing: Once thoroughly chilled, remove the foil and cut into your desired number of squares (20 is a good standard). Store your Rocky Ledge Bars in an airtight container at room temperature for up to one week. They also freeze beautifully! Individually wrap them in plastic wrap, then place in a freezer-safe bag for up to 3 months. Thaw at room temperature for a quick treat.
Getting the Kids Involved
Rocky Ledge Bars are a fantastic baking project for little helpers! Kids can easily assist with measuring ingredients (under supervision), mixing in the chocolate and marshmallows, and especially with scattering the remaining add-ins on top before baking. It’s a fun, hands-on activity that results in a delicious reward, fostering a love for baking from a young age.
From their humble brown sugar beginnings to their decadent, customizable finish, Rocky Ledge Bars are a true dessert phenomenon. Their addictive nature, combined with the joy of personalizing each batch, makes them a go-to for countless bakers. So, gather your favorite add-ins, get creative, and prepare to bake a batch of these unforgettable treats. Your taste buds (and anyone you share them with) will thank you!
